Monday, March 3, 2014

It's All Faux To Me... faux paint on kitchen and family room walls... Sponge and plastic wrap techniques

I like to try new things.
I also like to try new colors.
In my clothes, shoes, accessories...and on my walls!

I wanted an orangey color in the family room to liven it up and make it reflect me...

Oh, and be the opposite of what it was.

What was it you ask?

The bottom was dark evergreen and the top was green ivy vines on a white background wall paper.
Now it wasn't bad. The wallpaper covered the top 3 feet while the bottom 5  feet was the dark green. In a huge room with natural light pouring in from 4 windows and 2 french doors... the dark walls kept  the room from being too bright or unwelcoming.

But, after 15 years I wanted something different to go with the whole kitchen/breakfast room/family room make-over.
We built the house 19 years ago with what was then an innovative floor plan featuring an open area across the back 2/3 of the house that comprised the kitchen, a morning room, and the family room.

The family room and morning room (breakfast room) have large french doors that open to ...
well the family room opens  to a large deck, while the morning room doors open to nothing since we haven't agreed on whether to make a small balcony for a  bistro set or to make a larger one that spans that half house to connect the morning room with the doors that lead out of the dining room to nothing.

It took us 10 years to agree on a storm door so...don't expect a decision on this any time soon.


SUNFLOWER is the name of the top color...
the glaze toned down the orange without making it look dingy
the  bottom is sage green but I am thinking it might
become something else soon
As I was saying.
I wanted color...and boy did I get it.
Remember all that light we get in that room?
Well, it made the walls glow... and NOT in a good way.


So rather than repaint it all again, I opted to use a faux finish to tone down the orange without ruining the punch of color I wanted.

The glaze is transparent so it adds just a hint of bronze
 To achieve this look I used a faux finish wall glaze- found in your craft or home improvement store, a roll of plastic wrap and a soup bowl.

First- glop some of the faux finish into the bowl.

Second- add a teaspoon of water and gently mix it into the glaze until it is very watery-
-- add a few drops of water at a time if needed to get it thinner.

Third- tear off a piece of plastic wrap that is large enough to cover a casserole or baking dish...about 9-12 inches long...and then lightly scrunch it into a pouf .
Close up of the kitchen wall ( below) after glaze has dried

The final step is the hardest...

Dip the top of the plastic wrap pouf into the bowl of thinned glaze and gently dab
excess onto a paper towel.

Now just lightly dab the pouf onto the wall.


More  glaze on the pouf makes a darker contrast, but too much and it will  run down the wall.
For the kitchen wall I wanted a slightly different texture so I used a slightly damp sea sponge to pounce the glaze over the wall  in large random circular motions.

Experiment with your wall...if you don't like it you can wipe it off with a damp cloth and start over!
The kitchen wall from a distance...the same glaze used on the orange walls in the family room toned down the yellow and gave it the look of old-fashioned plaster walls

So go ahead...
get creative...
try something new...

After all...
It's Only Paint !

Tuesday, February 25, 2014

Scrapbooking...not just for books!

Yes, you read that correctly!

Did you know that you can  get 16x16 square frames designed to fit scrapbook pages at your local craft supply store?

Well - Now You Do!

The best thing about these frames is that they are similar in depth to shadowbox frames, but not quite as deep and not nearly as pricey!

This means that you can create beautiful scrapbook pages for any occasion...
Complete with the embellishments that make  your heart sing...
ribbons and bows
buttons and brads
coins, concert tickets...
even a child's cherished keepsake or small trinket or toy...

And it will fit!

I  had a great idea to make a page for each birthday  for my grandchildren with photos and momentos from that year ...
put it in a frame until the next year.


Once removed from the frame for the new page the old one would be put into a scrapbook album.

After 18 years there would be a completed scrapbook  for each child to take with them on their journey to adulthood...be it college or marriage or  whatever... that would keep them in touch with  their loved ones and the memories of their childhoods...

I am sorry to say that plan has not worked out as I has planned... I still plan to make those pages...I just have a few years to catch up on that's all.


So-here  is what I did instead...
To commemorate the visit from HeManHubby's brother and his family from DownSouth this year I out photos of their little ones and our grandkids- FancyPants and BabyG.


I think it turned out well and it looks great on the wall between the kitchen and the family room.


Happy Crafting!
        ~d

Tuesday, February 18, 2014

Owl You Need is ... a Little Peel and Stick


I got these peel and stick wall stickers at Pier 1 last year on sale...  
No idea what I would do with them, but I couldn't resist...can you blame me?


Then I found this frame at Hobby Lobby for half price after Christmas.

And an idea began to take shape on how to put  those Owl stickers I had been holding onto to good use.

All I needed was a little something special to make it come together...

and then I went to the dollar store...

And I found this transparent wall sticker with the perfect inspirational phrase...

Well, it's perfect for my family and what I them to believe...


Put it all together and you get...


To make your own inspirational wall art just do what I did :

1) clean the glass on both sides of the frame. The peel and stick graphics go on the front of the       glass so you can leave it in the frame.

2) place the frame-with glass in place- on a flat surface and simply arrange your peel and stick        wall stickers on the glass the way you want. Be sure to apply them from bottom to top, slowly      rubbing as you go to remove air bubbles.

3) To get a 3D look figure out where you will hang your framed art and arrange the inspirational     peel and stick graphic on the wall so that it is visible on the wall behind your framed piece.


The finished effect will have a 3D look from  the shadows cast by lighting or sun shining into the room.
Like this:


Oh- please ignore the messy sofa...a family of 6 lives here and I like throw pillows and blankets!

Next project is to fill the bottom of the wall with old family photos... not sure just how yet but I'll be posting it once I am!

Happy Crafting 
~d


Thursday, October 31, 2013

Wax On.... Wax Off.... or something that sure felt a lot like that

This is a DIY Custom Kitchen Renovation that would have cost around 75 thousand US dollars.... 
It's not costing us that much... yet?

We have been renovating our kitchen since March....
And please note that when I say WE what I actually mean is THEY....

Don't get me wrong.
I have been doing some of the work.

I pulled the old staples and nails out of the subfloor...

after HeMan Hubby ripped out the ceramic tile, the plywood under that, the original vinyl and the water logged and moldy areas of sub-floor under that...

I helped lay the new flooring...

I mean I held it in place while it was measured and I helped to get the tongue and grooves in place...
Mostly I chose the right color, style and material to use for optimal bang for the buck...
and I went out and bought 43 cases of flooring, loaded them into the van and brought them home.

I helped to lay the ceramic tile on the mud room floor... In a traditional brick pattern that I really like... and I only changed my mind once and that was BEFORE the grout had even begin to set on the first tile...

of course that was AFTER HeMan Hubby and his dad created a mud room from nothing...

Then I painted the family room wall that was damaged during the creation of the mudroom....
and the mudroom and the kitchen where the wall was extended to create the mudroom...

And then I painted the trim work around the door to the mudroom...
I designed it, like I designed the crown molding that isn't crown molding around the family room and breakfast room ...

We just call the door trim Pi....
that's the only way I could describe what I wanted it to look like to HeMan Hubby that he understood...

and the name stuck. Eventually all the doors will have Pi molding... eventually.

Next came the kitchen island...
And please allow me to brag a bit here on not only my design, but HeMan Hubby's excellent carpentry work.

With some give and take and pouting and shouting we arrived at the perfect island for our home...

The reclaimed lumber used to make the island top was cut into beams for a house about 100 years ago... at that time the tree that was used was about 300 years old... My counter top was a baby tree during the Revolutionary War! 
Now that is Freakin! Awesome! I wonder if it's haunted...?

Note the dark stained hand scraped flooring.... pretty isn't it?

The original planks were about 12 inches wide and 10 to 12 ft long and very roughly hewn when we brought them home from the salvage yard...
HeMan Hubby and his dad had to plane and cut and sand each piece to make them fit together. Then they had to run a metal bar through to help hold them all together along with the dowels and glue... and then they had to create a template from the reclaimed sink... and then cut it out... 

Nothing,andI mean NOTHING, went as smoothly as it sounds... maybe because I changed things along the way? 
Maybe because the wood was so very well aged? Maybe because that is just how these projects go in our house...

But finally it is starting to come together...as long as I don't make any more changes and HeMan Hubby agrees with the rest of my plans...

So, after many, many layers of a blend of Tung oil and Lemon Oil  (wipe on, let soak, wipe off, wipe off, wipe off, let dry, repeat x 5 , 6, 7)

this is what the counter top looks like... all 2 1/2 inches by 3 1/2 ft by 9 ft....

Isn't it just awesome?
As is HeMan Hubby....
And his Dad...
And me, for designing such an awesome space...
Okay, mainly them, but didn't I do a good job with the wax on, wax off part?

Stayed Tuned for More of our DIY CUSTOM Kitchen Reno project photos and the stories to go with them.... 
should be real interesting...Yikes! 


Tuesday, October 8, 2013


Me...Knitting a Sweater... who woulda thunk it?            

Yes !
I am knitting a sweater. Well, actually it's a jacket-y kind of thingy with cap sleeves and a cute wrap around look...

I found it on Knitty.com - a site that is a MUST SEE for anyone looking for a new project.

Here is the link to the jacket-thingy:

http://knitty.com/ISSUEsummer08ATTheyteach.html

I'm looking forward to finishing this foray into knitted garments... my first, but hopefully not my last.

Did I mention I have NEVER knitted clothing before? Did I also mention I have never used a graph pattern instead of written pattern in my life...

I think I'm doing okay... So far.

Trying to get the right gauge... not as easy as it looks! 
Back panel done... only frogged it 3 times! 

Pattern Close UP

Sunday, June 16, 2013

Today is the Day... That Color Me Crafting Begins!

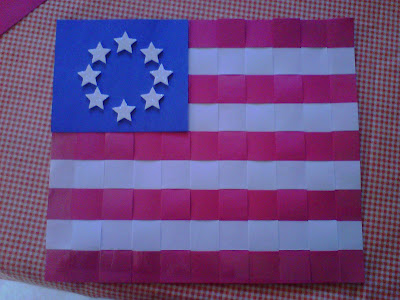
Yes... I created this awesome placemat...
from my own pattern... don't worry I'll show you how too!
Yes...
Today is the day that I start to live again...

Okay, not that I wasn't living but...

I kinda wasn't.

For the past 10 months I have been working days...
as a school nurse...
in an elementary school...
with little kids...

And they whine...
and they snot on you...
and they throw up on your shoes...
and they cough in your face...
and they ...
SUCK THE LIFE RIGHT OUT OF YOU!

And then there's the families...
Like a box of chocolates... some are just full of nuts!

Okay, not really, but kinda, yes.

It is a job that leaves me mentally, if not physically exhausted...
Tired of being accused of being too nice, not nice enough, and everything in between...
every single friggin' day...

Which means that when I come home and sit down for a minute...
I rarely have the energy to do anything else for the rest of the day...

But Wait!
There's More! 
( yes, that IS the voice of Billy Mays you hear in my head)


These little critters are easy and quick to crochet... perfect for gifts for your little critters!


Today
(or tomorrow, all depends on when you got to sleep), is the last day of work for me for the school year...
YES...
That IS the Hallelujah Chorus you hear...(again, in my head)...
And YES...
That IS the pop of a champagne cork ( those things could put an eye out)...
And YES...
Those ARE tears of joy and elation as...
CREATIVITY and INSPIRATION come rushing into me...
like a flood from the heavy rains of Spring after a long, dry spell...

YES! YES! YES!  ( Think Meg Ryan and the diner scene from When Harry Met Sally...)
Today is the day that Color Me Crafting begins!

well...
actually, it is tomorrow since today I HAVE to go in and finish up my paperwork...
but then...
Look Out Crafters of the world... I'm gonna have a ton of stuff to show you...
okay, maybe not a ton, but certainly a lot...
well, enough to get you going...?
some ideas to inspire you to go to the craft store...?
to get off the couch and go clip some coupons...?
alrighty then...
PREPARE TO BE CRAFTING!)